Tuesday, 12 April 2016

How to solve the 10 most common tech support problems yourself


Whether you’re dealing with your dad’s decade-old computer or your own custom-built gaming rig, troubleshooting PC problems is a part of everyday life. Before you make that $50 support call, though, try your hand at homebrew tech support. We spoke to some of the best support reps in the business about the most common problems they fix—and how you can do it yourself.

Try this first

I know it sounds like a no-brainer, but before you do anything else, restart your computer. Matthew Petrie of Falcon Northwest technical support says that most of his customers solve their problems with this simple step. “This long-standing maxim can work wonders,” says Petrie.
Regularly checking for operating system updates is important, because forgetting to do so could significantly impair your PC’s performance.
While you’re at it, make sure that your operating system is fully updated by running Windows Update. Neglecting updates could deprive you of important bug and performance fixes.
If you’re having problems with a peripheral, try switching it on and off. If that doesn’t work, try disconnecting and reconnecting the device. As a last resort, download the latest drivers and perform a full reinstall.

My computer is too slow

The first step to fixing a slow computer is to verify that your machine is the actual source of the problem. Videos that seem to buffer forever, and websites that take ages to load, may not be your computer’s fault. Geek Squad agent Derek Meister claims that many people mistakenly identify a slow system as the problem when “it’s actually not the computer, [but] their broadband connection.” See “Downloads are taking forever” below for instructions on how to use Speedtest.net to diagnose a slow connection.
If the problem is your PC, check whether you have plenty of free space on the hard drive holding your operating system. Windows needs room to create files while your system is running. If your hard drive is maxed out, performance suffers. Now is the perfect time to clear some space.
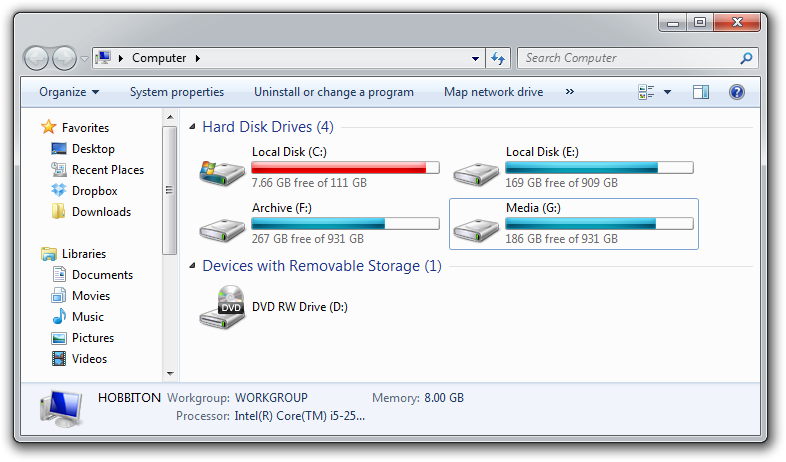
If your computer’s operating system resides on an overstuffed C: drive, clearing out some space could boost OS performance.
Microsoft’s System Configuration tool is your next-best bet for tackling slow performance. Many applications launch automatically when your machine boots up, which can stretch out boot time—especially on older, slower PCs. Make a habit of trimming the startup items. Open the tool by pressing Windows-R, typing msconfig, and pressing the Enter key.
Checking the Startup Item and Manufacturer columns is the best way to figure out which potential performance-killers you can safely disable. Avoid messing with any of the services and programs that have Microsoft Corporation listed as the manufacturer. Items such as AdobeAAMUpdater, Google Update, Pando Media Booster, Spotify, and Steam Client Bootstrapper are all fair game. Regardless, err on the side of caution: If you’re not sure what the program or service does, don’t disable it.
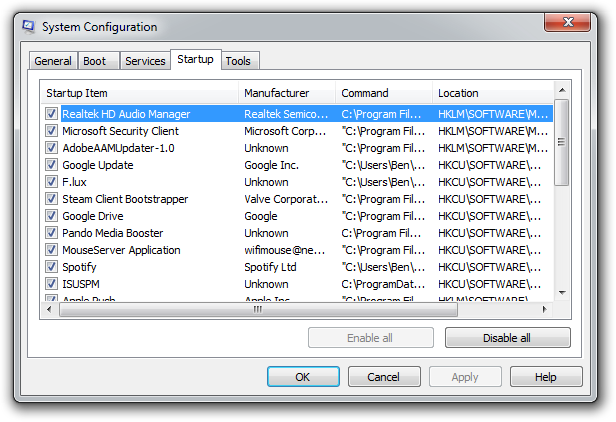
Windows’ System Configuration Tool lets you disable programs and services that automatically start when you boot your computer.
Once you’ve made all your changes, click OK and restart the computer. It should boot up quicker and feel noticeably faster.

Downloads are taking forever

Speedtest.net is your best friend when you're having connectivity problems. Run a speed test to see what your download and upload speeds are—ideally they should be at least 50 percent of your Internet service provider’s advertised speeds, with a ping under 100 milliseconds.
If the speeds seem solid, make sure that you aren’t inadvertently downloading or uploading anything. Many torrent downloading programs run in the background and minimize into the system tray instead of the taskbar.

A good speed test should give you an accurate assessment of your ping, download speed, and upload speed.
Check your network hardware. Updates for network cards aren’t all that common, but if your card’s manufacturer offers a newer driver, download it. Resetting your router and modem can help with connection problems, too. Most routers and modems have reset buttons, but pulling the power cable for a second or two can do the same thing. Don’t cut the power for much longer, or the hardware may reset itself to factory defaults.
Still having problems? Call your ISP, which can tell you whether the problem is on your end. As a last-ditch measure, the ISP could reset the master connection to your home.

My machine keeps restarting

Hardware problems are hard to diagnose and solve. First, confirm that you aren’t just getting the latest wave of Windows updates, which can automatically restart your computer during installation. Then work on updating all of your critical system drivers. Your graphics card, motherboard, and network card drivers are crucial.
“Sometimes it can be viruses, sometimes it can be adware, sometimes it can be overheating, and sometimes it can be something as simple as making sure your video card is updated,” Geek Squad’s Meister says.
Is your computer making weird noises? If you’re lucky all you’ll need to do is give the machine a thorough cleaning. Modern computers have safeguards that shut down the system if a component is overheating, which can be the cause of frequent restarts when you’re running resource-intensive programs or video games.

Pop-up ads are appearing on my desktop

If you’re not running your Web browser and are still getting pop-up ads on your desktop, you’ve most likely installed adware—a program that displays unwanted ads. Although benevolent adware exists, most of the time adware is up to no good. Getting rid of it isn't easy. “There’s a ton of little system-utility tools out there that promise to clean up everything, with names like PC Speed-up, PC Speed Pro, PC Speedifier,” Geek Squad’s Meister says. “A lot of times those programs are not going to do much. Some programs will work, others are snake oil.”
Avoid downloading programs that offer to speed up your PC or clean up your registry. Instead, use a trustworthy adware scanner like the free version of Malwarebytes' Anti-Malware tool.
Running a full scan with credible antivirus software is your first step. If that program doesn’t find and remove the adware, turn to Malwarebytes Anti-Malware Free, a great utility for removing all types of malware. Just make sure to disable your standard antivirus software before running it.
“Multiple antivirus programs working at the same time will often result in problems,” Falcon Northwest’s Petrie says. “You only want one active, real-time antivirus scanner installed, but it doesn’t hurt to run an additional ‘on demand’ virus or malware scanner.”
Searching online for the name of the advertised product can sometimes yield solutions from fellow victims. If all else fails, there’s always the nuclear option: a complete system reinstall. It might take a long time, but it’s the only surefire way to remove adware or spyware. Remember to back up all your personal files.

Google doesn’t look right

Browser hijackers are a particularly nasty breed of malware. Such programs take over your Web browser and can stealthily redirect your Google searches and other queries to fake pages meant to steal your personal information or to further infect your system.
Running a real-time antivirus utility is the best way to stay safe. If your browser has already been hijacked, uninstall the browser and use your antivirus program in conjunction with Malwarebytes to remove the intruder.

My Wi-Fi keeps disconnecting

Spotty wireless connections can be a puzzler. Is it your computer? Your router? Your ISP? Try a few things before calling your Internet service provider.
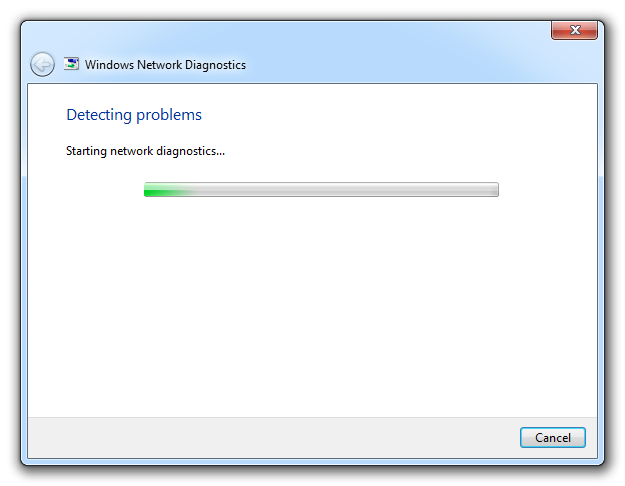
Windows Network Diagnostics may not always solve your problem, but it will usually point you in the right direction.
Confirm that your computer is within range of your wireless router. Weak signals mean weak connections. Next, make sure your PC’s wireless card has the latest drivers. Try letting Windows troubleshoot for you by right-clicking the Wi-Fi icon in the taskbar and selecting Troubleshoot problems.

I keep seeing ‘There is a problem with this website’s security certificate’

Sometimes the biggest problems have the easiest fixes. According to support technicians, the lion’s share of issues are due to an incorrect system clock.
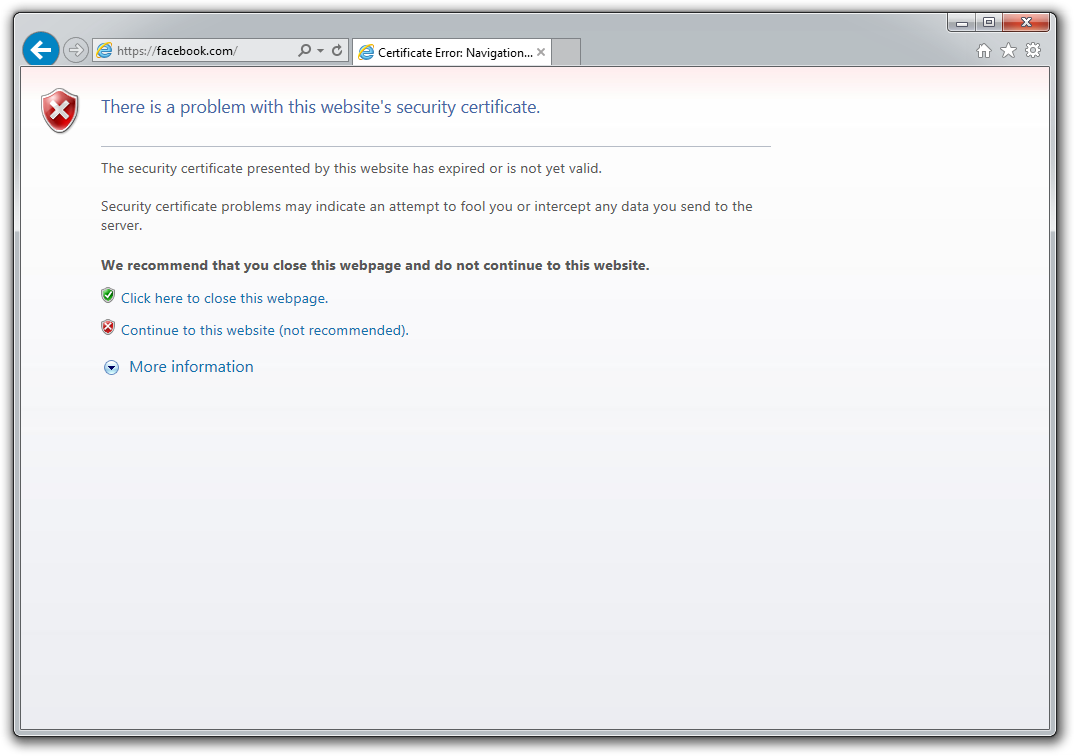
The problem is probably with your computer.
Website security certificates sync up with your computer’s clock. Old computers in particular run the risk of having a dead CMOS battery—the watch battery in your computer that keeps its system clock ticking. Click the clock in the system tray and select Change date and time settings to correct any issues.

My printer won’t print

Let’s assume that your printer’s drivers are up-to-date, and that it has enough paper and ink or toner to print. Try turning the printer off and on. Unplug the printer and plug it back in. Check your printer’s print queue by looking for the printer icon in the system tray and double-clicking it. The print queue shows you the status of each job as well as the general status of your printer.
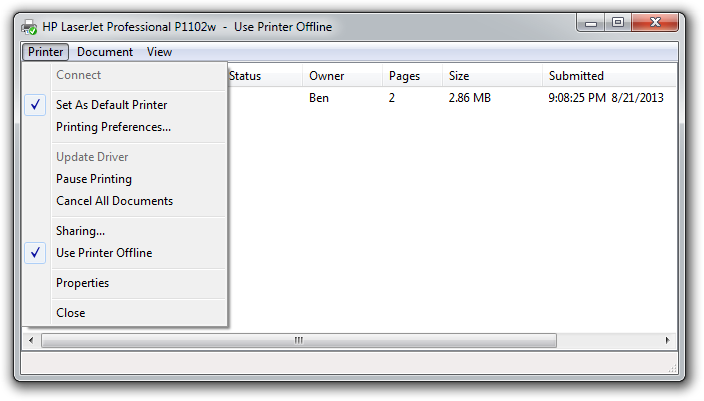
The print queue is your best bet for troubleshooting printer problems—just make sure that ‘Use Printer Offline’ isn’t selected.
Ensure that ‘Use Printer Offline’ isn’t checked. Sometimes, printing while your printer is turned off can cause Windows to set your printer to work offline, and that can stall jobs sent later.

I can’t open email attachments

If you have ever encountered an attachment that you couldn’t open, it was probably because you didn’t have the software necessary to view the file.
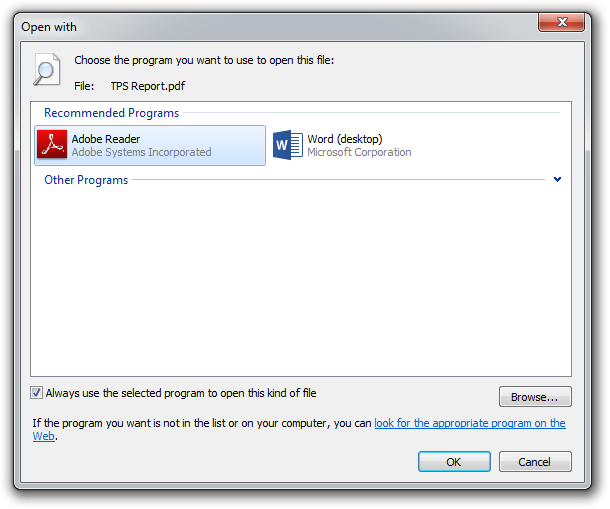
If you don’t have Adobe Reader or another PDF-compatible program, you won’t be able to open that TPS report.
The usual suspect is the .pdf file, for which you can download a free PDF reader. If your problem involves a different file format, a quick search on the attachment’s file extension (the three letters after the period in the filename) should tell you what type of program you need. If the attachment lacks a file extension (which might happen if it was renamed), adding it back should set things right.

My favorite program isn’t working on my new PC

Before you call tech support, make sure that the software you’re trying to run is compatible with your operating system. Older software might not function on Windows 8, and an app created for Mac OS X definitely won’t run on your Windows PC. A 32-bit program might run on your 64-bit operating system, but it doesn’t work the other way around.
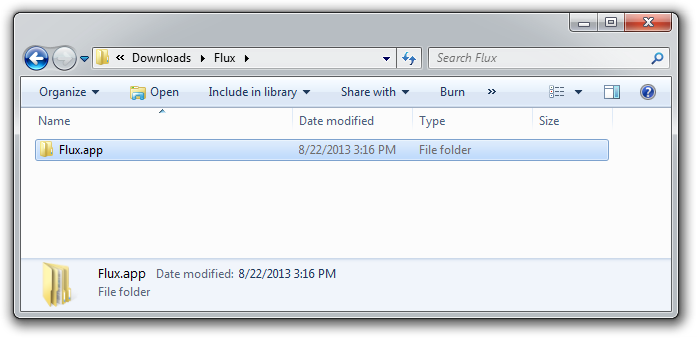
Not all file types work on Windows. For example, files that have the .app extension run exclusively on Mac OS X.
To Any Queries Send the Mail Click here..
BY


STATIC IP Tutorial - How To Setup A Static IP Address MADE EASY


To Any Queries Send the Mail Click here..
BY


Pen Drive is not getting detected or showing in My Computer - Fixed


To Any Queries Send the Mail Click here..
BY


Monday, 28 March 2016

Easy Solution For “Unable To Load..Torrent Is Not Valid Bencoding”

There is an easy solution for the error “Torrent is not valid bencoding”. In this tutorial, I am going to discuss about the reasons and possible solutions for the error “Unable to load Torrent is not valid bencoding”.

Best way to download movies or any other content from internet is, by using torrents.In recent days, it is getting tough to download content from torrents. There are some reasons why you get this error.

Reasons

  1. ISP corrupting torrent file : Now a days ISPs are corrupting torrent files because of government restrictions. It is not the case in all the countries. But it is the main reason in many countries.
  2. Probably, You have downloaded corrupted file.

Solution for  “Unable To Load..Torrent Is Not Valid Bencoding”

Here I am showing you three solutions for this issue. First solution is the best one for everyone. When first solution fails for you, then you may try remaining two solutions.

Solution 1 : Use magnet link

When you download torrent file to your computer, there is chance that ISP corrupt the file. When you download directly without downloading torrent file, there is no question about ISP corrupting your torrent file. Almost every torrent website provide option to download through magnet link.
If you are downloading torrents through kickass(https://kat.cr). You can see magnet link just left to download torrent button shows that in below screenshot.

ust click on magnet download link. It will start download from your browser download manager. In this case you may see two issues. Those are, browser down-loader will not support resume ability and download is slow. For this reason, I can suggest you to use free download manager(FDM). It will have resume ability. And it accelerates your download speed. That means, you can download torrents as in BitTorrent client software.

Solution 2 : Download same file from other website

There is chance that, you have downloaded corrupted file. That means torrent website may have corrupted file it self. Just try to download same file from other torrent website. It may work.

Solution 3 : Use VPN

When above two methods failed and you are serious about downloading torrents, then you must use VPN service. VPN hides your IP, unblocks any website and provides security. No one knows about your computer IP and it’s physical location when you use vpn service. Even ISP cannot find your IP and it’s location. So there is no chance to corrupt your torrent files. There are many VPN service providers available. You may try hide me vpn service (35% discounted link). Because kickass torrent website recommends hide me vpn service.  
I hope you like my article about solution for Torrent is not valid bencoding. If you like it, do me favor by sharing it with your friends.
To Any Queries Send the Mail Click here..
BY

Sunday, 20 March 2016

How to resolve Windows Blue Screen Errors

The blue screen (or blue screen of death, blue screen of doom, or BSOD) is properly known as a “Windows Stop Message”.  It is displayed when the Windows kernel or a driver running in kernel mode encounters an error which cannot be handled.  This error could be something like a process or driver trying to access a memory address which it did not have permission to access, or trying to write to a section of memory which is marked read-only.
More to the point, Stop messages don’t occur without a reason; they are an indication that the system has a problem somewhere – hardware, software, or device drivers can all be the cause of the fault.  Often a simple reboot will get the system up and running again, but if the underlying problem is not solved, the blue screen will probably come back again.
Let’s look into some methodical approach to troubleshooting stop messages, with a few simple steps which can take a lot of the guesswork out, and could get your system back up and running more quickly and easily than reinstalling the operating system.

Step 1 – Read the message

It may sound obvious, but the first step is simply to read the message displayed on screen.  Often there is enough information displayed to point you to the cause – if the stop error is caused by a kernel-mode driver, the driver image name is generally shown in the message.

Figure 1 – Windows Stop Message Caused By myfault.sys
Figure 1 is an example of a fairly common stop message – “DRIVER_IRQL_NOT_LESS_OR_EQUAL”.  This stop error is caused when a kernel mode driver attempts an illegal memory access.  The “Technical information” section shows the STOP code, and also lists the specific driver which caused the fault – in this case it’s “myfault.sys”, which is the driver installed by the Sysinternals utility NotMyFault.exe. In a real-world crash, the driver image name could be any kernel-mode driver installed on the system, but once you know the name of the driver it can be located on disk, and the vendor found by checking the file properties.

Figure 2 –Properties of myfault.sys Driver File
In terms of finding quick solutions to the problem, the vendor may have an updated driver you can try, or could have a knowledge base you can search for a resolution. However, not every stop message will make it that easy – sometimes there is little more than a STOP code.

Figure 3 – Windows Stop Message 0x0000007B
Although it looks fairly Spartan, there is still some useful information in this message – the “Technical Information” section includes the STOP code (0x0000007B in Figure 3), and occasionally that can be enough to get started with troubleshooting.  However, unless you already know what error the stop code translates to, this is where we move to step 2: Searching.

Step 2 – Search

If the stop message hasn’t given enough information to start troubleshooting, the next step is to search for more details.  Again, this may sound obvious, but in my interviews I was also surprised by the number of people who did not mention that they would use the Microsoft Support knowledge base, Microsoft TechNet, MSDN, or some other on-line resources when troubleshooting blue screen errors.
For example, a quick search of MSDN or TechNet will reveal that the stop code shown in Figure 3, 0x0000007B, translates as INACCESSIBLE_BOOT_DEVICE, which means that the operating system failed to initialize the storage device it is attempting to boot from during the I/O system initialization. This generally indicates a storage driver problem, and knowing that the problem is caused by the storage subsystem helps to focus troubleshooting to a specific area, which should make the error easier to diagnose.
There are many, many websites offering help with troubleshooting stop errors.  My preference is always to start with Microsoft sites or hardware vendor sites, then broaden my searching to other sites and forums if I can’t find what I need.  In most cases, someone else will have experienced the same problem, and there may be documented solutions or workarounds offered.
Of course, both steps one and two rely on one crucial thing – that you’ve witnessed and/or recorded the stop message.  If you haven’t seen the stop message occur, then you can find the stop error and parameters in the System event log, but unfortunately there are no additional details such as the stack trace. Nevertheless, even withthe details of the stop message, there still may not be enough information for a conclusive diagnosis, and at this point we need to move on to step three: Crash dump analysis.

Step 3 – Analyze

The third and final method in my approach is to perform basic analysis on the crash dump file, which all Windows systems are configured by default to create.  There are three types of crash dump file, and the settings for controlling which type of files are created can be found on the Advanced tab in the System Properties dialogue box.

Figure 4 – Startup and Recovery options
Complete Memory Dump
A complete memory dump contains all the data which was in physical memory at the time of the crash.  Complete dump files require that a page file exists on the system volume, and that it is at least the size of physical memory plus 1MB.  Because complete memory dumps can be very large, they are automatically hidden from the UI on systems with more than 2GB of physical RAM, although this can be overridden with a registry change (which I won’t discuss here).
Kernel Memory Dump
A kernel memory dump contains the kernel-mode read/write pages which were in physical memory at the time of the crash.  The dump file also contains a list of running processes, the stack of the current thread, and the list of loaded device drivers.  Kernel memory dumps are the default on Windows Server 2008 and Windows 7.
Small Memory Dump
A small memory dump (sometimes also called a mini-dump) contains the stop error code and parameters as well as a list of loaded device drivers, and a small amount of other data.  Small memory dumps must be analysed on a system which has access to exactly the same images as the system which generated the dump file, meaning that it can be difficult to analyse the dump file on a system other than the one on which it was created.
For basic crash analysis, a kernel memory dump is usually adequate and, as shown in Figure 4, the default location for its creation is %SystemRoot%\MEMORY.DMP.  The tool required for analysing the crash dump file is WinDbg, the Microsoft Windows Debugger, which can be downloaded from Microsoft’s website.
After installation, WinDbg needs to be configured to use the Microsoft Symbol Server.  Once symbols are configured, click the File menu, choose Open Crash Dump, and select the crash dump file you want to analyze. The output from WinDbg will look like this:
Figure 5 – Windows Debugger Analysis
The second to last line, which starts “Probably caused by” indicates the debugger’s best guess at the cause of the crash.  In the example in Figure 5 the debugger is correct – this crash was caused by NotMyFault.  Other information in the analysis indicates that the crash dump file is a kernel memory dump, and that symbol files could not be loaded for myfault.sys (because it is a third party driver, and the symbols are not available on the Microsoft Symbol Server).
More information can be gleaned from the dump file by executing verbose analysis, using the debugger command!analyze -v.
Figure 5 – Verbose Windows Debugger Analysis
The verbose output shows the description of the stop message, which will save you having to search for it, and will also include the stack trace of the thread which was executing at the time of the crash, which could also prove useful if further debugging is needed.
Basic crash dump analysis is easy, the tools are readily available, and a lot of information about the crash can be found in just a few seconds.  If basic analysis doesn’t help to solve the problem, there are many excellent resources available which give much more detailed information about the Windows Debugger and its use, and can provide in-depth guides on how to extract and interpret the data using advanced analysis techniques.
To Any Queries Send the Mail Click here..
BY